 le
le
Tunnelmole Documentation


Tunnelmole is a simple tool to give your locally running HTTP(s) servers a public URL. For example, you could get a public URL for
- A web server
- A Docker container
- An API
- A React or node application
- A static website
Tunnelmole is Free and Open Source Software. The client is MIT licensed and the service is AGPLv3. The client will use the hosted service at tunnelmole.com by default so it works out of the box. It’s possible to self-host your own service.
Quick Demo
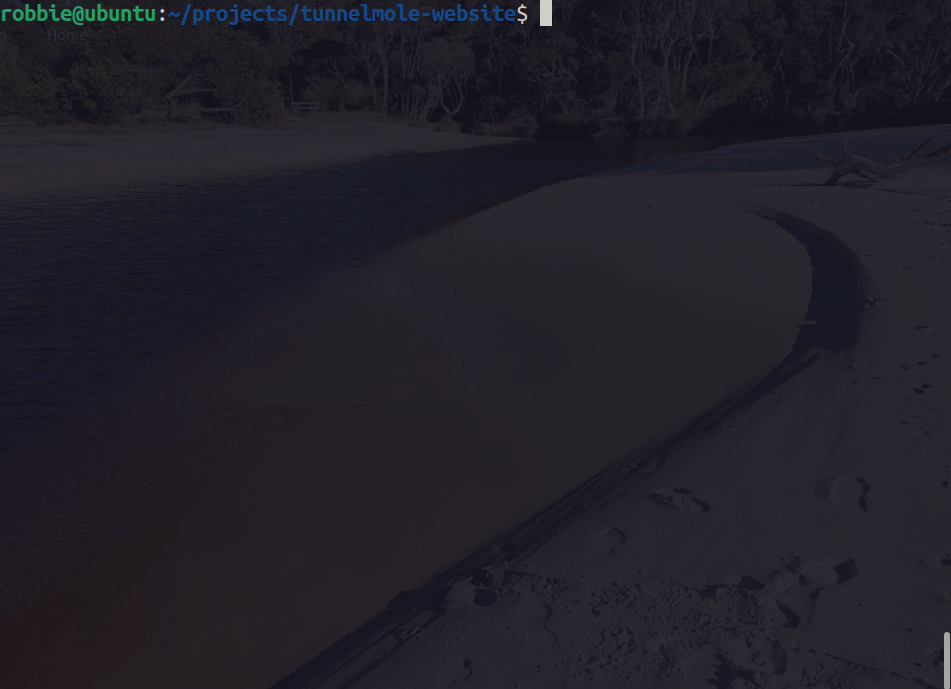
Getting a Public URL for the Tunnelmole Website, which is running locally
Heres what you could do with your new public URL
- Automate your life. With a public URL, IFTTT and other automation services can send you webhooks which your code can then react to
- Test and debug webhooks locally. Set a breakpoint, then trigger the webhook provider to hit your URL
- Use your phone to test the mobile version of your site, without cables
- Test advanced HTTPs only features such as Web Notifications and PWA’s locally, drastically speeding up the change/build/test cycle compared to deploying code to a remote server
- Cross device testing with real devices. Hop on another computer or device running the same or a different OS, then hit the public URL Tunnelmole generated for you
- Share it with anyone over the internet such as a friend, colleague or client to show off your work
Installation
There are a couple of ways to install Tunnelmole.
Universal Installer for Linux, Mac and Windows Subsystem for Linux
This is the easiest method with no external dependencies. Copy and paste the following into a terminal:
curl -O https://install.tunnelmole.com/n3d5g/install && sudo bash install
The script will detect your OS and install the correct pre-built binary version. The build process is open source, scroll down to see how you can build your own.
Optionally, you can audit the script before running it, by running curl https://install.tunnelmole.com/n3d5g/install
NPM
Tunnelmole is available on NPM. If you have NodeJS 16.10 or later, you can install Tunnelmole by running
sudo npm install -g tunnelmole
Windows executable
- Download tmole.exe
- Put it somewhere in your PATH.
Build your own binaries
The above binaries are generated with a combination of pkg and rollup.
To create your own, set up the Tunnelmole Client repo and then run npm run build-all-bin. Once that finishes, run the appropriately named binary for your OS from tmole-linux, tmole-mac or tmole.exe (windows). Send the other ones to your friends running different OSes.
Using Tunnelmole
- Start your web application locally and note down the port number its listening on
- Then Run
tmole <port number>, replacing<port number>with your applications port number. For example, if your application listens on port8080, runtmole 8080.
Here’s what it should look like
$ tmole 8080
http://evgtkh-ip-49-145-166-122.tunnelmole.net is forwarding to localhost:8080
https://evgtkh-ip-49-145-166-122.tunnelmole.net is forwarding to localhost:8080
Now, just go to either one of the URLs shown with your web browser. The URLs are public - this means you can also share them with collaborators and others over the internet.
Custom subdomain
Sometimes, it can be useful to have a domain that does not change frequently. To use a custom subdoman run
tmole 8080 as <yourdomain>.tunnelmole.net.
If you are using the hosted service (which is the default) and you want to use a custom subdomain you’ll need to purchase a subscription Learn More.
Otherwise, you can self host. To learn more go to the Tunnelmole Service GitHub repo.
Using Tunnelmole as a dependency in your code
Tunnelmole is a JavaScript application available on NPM and can be used as a dependency if you have Node 16.10 or later.
Add the dependency
Add Tunnelmole as a dependency with
npm install --save tunnelmole
Starting tunnelmole using code
First import tunnelmole. Both ES and CommonJS modules are supported.
Importing tunnelmole as an ES module
import { tunnelmole } from 'tunnelmole';
Importing tunnelmole as a CommonJS module
const tunnelmole = require('tunnelmole/cjs');
Once the module is imported you can start tunnelmole with the code below, changing port 3000 to the port your application listens on if it is different.
const url = await tunnelmole({
    port: 3000
});
// url = https://idsq6j-ip-157-211-195-169.tunnelmole.net
Tunnelmole will start in the background and you’ll see output in the console log similar to the Tunnelmole command line application which will include the public URLs that now point to your application. The function is async and won’t block execution of the rest of your code.
If you want to use a custom subdomain, you could also pass the domain as an option.
const url = await tunnelmole({
    port: 3000,
    domain: '<your tunnelmole domain e.g. mysite.tunnelmole.net>'
});
// url = mydomain.tunnelmole.net
Again if you are using the hosted service (which is the default) and you want to use a custom subdomain you’ll need to purchase a subscription Learn More.
Otherwise, you can self host. To learn more about this option go to the Tunnelmole Service GitHub repo.
Suppress output/logs
To suppress the initial output with the URLs, set the environment variable TUNNELMOLE_QUIET_MODE=1 somewhere in your environment. This might be useful in a CI/CD environment or in other scripts.
Using Tunnelmole with NPM scripts
Installing Tunnelmole as an NPM dependency will make the following executables available in your project:
node_modules/.bin/tmole
node_modules/.bin/tunnelmole
They both work identically to the Tunnelmole command line application.
You can run them manually in the same way as the command line application (for example node node_modules/.bin/tmole 3000), but its far more convenient to integrate them with NPM scripts in package.json. This way, you can automate starting your application and generating a public URL with a single command. For example:
{
    "name": "myapp",
    "version": "0.0.1",
    "scripts": {
        "start": "dist/index.js",
        "start-public": "npm run start && tmole 3000"
    }
}
In this example, npm run start-public will simultaneously start your application and get tunnelmole to generate public URLs tunneling to port 3000. Replace port 3000 with the port your application listens on if it is different. You will see the public URLs in the command line output.
This allows you to start your application and get a public URL with a single command, instead of needing to run two commands in separate terminals.
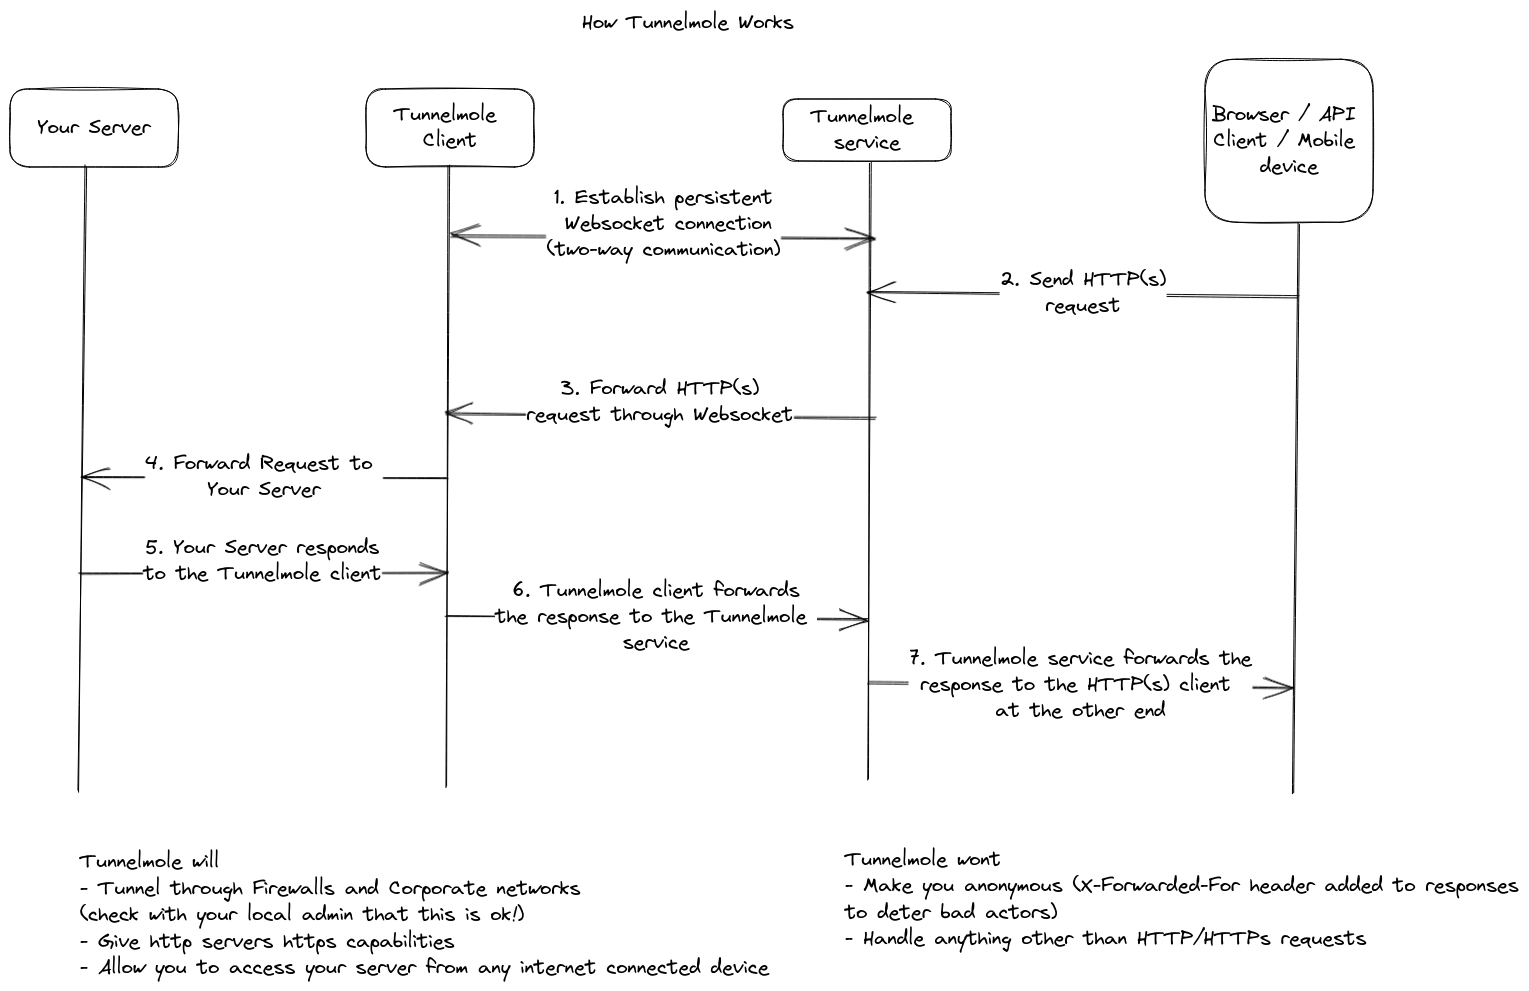
How it works
Telemetry
To help improve the developer experience of Tunnelmole, some anonymized Telemetry data is collected by default.
For example
- Your NodeJS version and OS, to help the developers know what platforms to support
- Crash reports which may include stack traces to assist in detecting and debugging unforseen issues that were not detected during testing (especially the “it worked on my machine” type).
To disable the telemetery, add the variable TUNNELMOLE_TELEMETRY=0 to your environment.
On Linux and Mac, to opt out for a single run of Tunnelmole you could put this in front of the tmole command, for example
TUNNELMOLE_TELEMETRY=0 tmole 80
To opt out by default:
- On Linux or Mac add
export TUNNELMOLE_TELEMETRY=0to your shells startup script, usually.bashrcor.zshrcbut it will be different if you are not using bash or zsh as your shell. Then log out and back in to apply the changes. - On Windows add
TUNNELMOLE_TELEMETRY=0to your environment variables using the System utility https://www.computerhope.com/issues/ch000549.htm. Then restart your computer to apply the changes.
More information
To get more info on hacking Tunnelmole as well as debugging, contributing and more view the full README on GitHub.
This package is for the Tunnelmole client. The service is also open source and its possible to self host. Get the code at (https://github.com/robbie-cahill/tunnelmole-service/).
If you found this useful, dont forget to Star On GitHub